Monday, May 28, 2012

homemade toothpaste

So, I've been wanting to make my own toothpaste for a while now. But just never got around to it, because (yes, I'm admitting it openly) I still battle with being a procrastinator... Not that we went without toothpaste while I procrastinated of course! But I just never seemed to find the time... :) 
So after hearing of my mother-in-laws happiness with her new homemade toothpaste I decided to look up a few recipes and add my own flare (of course). The less fancy recipes, which were the multitude of what I was finding, all said 50/50 coconut oil and baking soda. I made sure to use organic virgin coconut oil and baking soda with nothing added to it. Because the baking soda was too salty for my liking I added a small scoop of pure stevia and a capsule full of cinnamon (I take a cinnamon supplement before meals to help my sugar levels stay even...) so I think a small scoop of cinnamon would be fine, maybe 1/2 tsp for the batch. Here are the measurements I used.


4 tbsp organic, virgin coconut oil
4 tbsp pure baking soda
1 scoop of pure stevia powder
1/2 tsp cinnamon (EDIT: try organic peppermint extract instead, much better!)

Mix well and store in a small glass jar with a lid. Keep a small spoon handy for scooping onto your brush.
Some of the praises people were singing about this type of homemade toothpaste mostly revolved around the coconut oil. Many people stated that coconut oil has anti-fungal and antibacterial properties so it can stay on your counter without refrigeration and keeps your toothbrushes clean.

When using I find that it's best to turn the hot water on, scoop paste onto my wet brush, keep the water trickling to heat up while I brush, then when done - rinse the brush in hot water and the scoop/spoon so that the oil doesn't get the chance to harden in the pipes on it's way down the drain.

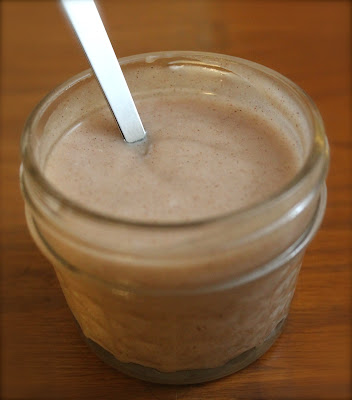
All in all, I too, am extremely pleased with this stuff! My teeth feel super clean and the cinnamon and stevia combated the saltiness of the baking soda pretty well without going to the other extreme and becoming too spicy with too much cinnamon. But play around with the amount of cinnamon and stevia till you find your preference. As you can see in the shot I like to call the 'action shot' it's pretty much the same consistency as regular toothpaste - maybe a bit less stiff than some brands but it stays on your brush while you go from scooping to popping it in your mouth to brush... !



Friday, May 25, 2012

got a picky eater?

If you've got someone who refuses to eat certain vegetables, they proclaim to you in a booming voice that they don't like it, never have - and never will.... well, just roast it! I've gotten my husband to eat many vegetables he said he'd never like by simply roasting them the first few times I fed them to him.

< - > brussels sprouts < - > zucchini < - > yellow squash < - > asparagus < - > sweet potatoes < - > 

But mostly any vegetable seems to be delicious roasted. I don't think I've tried one and disliked the result, honest. 


Simply cut into bite size pieces and roast with a little salt, pepper, and olive oil. That's it! Roast in the oven until done (I typically set the oven to 375). It's especially good (if they like the additional veggies) with slices of garlic and thinly sliced onion too. Just make sure to put the slices of garlic on top of another vegetable because when they're directly on the baking sheet they tend to burn. With all the roasted veggies done it's a great topping over some pasta or some crunchy bread. 

Monday, May 14, 2012

etsy find : loaded baked potato

A loaded baked potato BEAN BAG CHAIR that is... WITH a slab of butter pillow! 
$250 - B Fiber & Craft Emporium on etsy

There's also waffle and syrup sheets for your bed - with optional fruit pillows!


I just thought these were too cool NOT to share! I personally would not spend the money on it - but if I were to be insanely rich in the near future - I just might since it would be the coolest thing even to sit in the potato just once - haha Then after a little bit I'd probably donate it to a local kid's museum - can't you just see all the little ones getting the biggest kick out of it and all the fun photo ops for their parents!?! ^__^

Friday, May 11, 2012

Photo Fridays

Ah... internet memes. Remember when it was pretty innocent and cute though - like the lolcat photos > lolcat on wikipedia

So, for this photo friday - here's our little Billie - loldog style. ^__^

Thursday, April 26, 2012

Kitchen Tips: pets & scraps

Everyone drops food while cooking, and some like the idea that the living vacuum cleaner is always right there to suck it up. But keep in mind that some foods are harmful to certain pets. For example, garlic is said to rid dogs from fleas and ticks, but it might be toxic to cats.

Pets should avoid:
- all grapes, raisins, currants, etc. are potentially hazardous and shouldn't be given to your dog.
- of course, chocolate is toxic to dogs in large amounts...
- onions, chives (& some people say garlic should be avoided too)
- caffeine
- tomatoes
- avocados
- seeds and pits from fruit (they contain cyanide, thus the grapes)
- sugar and corn syrup
- nutmeg
- all nuts (their levels of phosphorus are said to cause bladder stones) exception: peanut butter - that's good for dogs (just use salt and sugar free peanut butter)
- cold cuts in large amounts are bad for dogs due to nitrates and salt content
- alcohol
- Xylitol - a sweetener used in gum and baked goods.


Of course if you drop a small piece of onion here and there, or garlic or any of the above you're not going to harm your pet, but I find it to be useful information nonetheless.

There's a lot of info out there on this subject > click here for a google search on the subject if you'd like to learn more.

Wednesday, April 18, 2012

mashed cauliflower

It's very rare that I actually enjoy eating cauliflower - never mind making sure I get every last bit of it off my plate like I did with this dish! A good friend, a while back, made me mashed cauliflower one day when we were over. And while I was thrilled and excited to have found a way to enjoy the white veggie it was because it was loaded with cream cheese and parmesan... this is just a bit better health wise but tastes better thanks to a little experiment that worked out well...

Ingredients:
1 med. head of cauliflower
1 - 2 cups chicken stock
1 tbsp ground almonds
1 tbsp earth balance* or butter
1/2 tbsp cream cheese
fresh shredded parmesan to taste


I know, I know - there's still cream cheese and parmesan - but it's a lot less than the original I assure you.
The almonds give this so much flavor - it's so good!

Directions:
> Cut up your cauliflower and place in a pot with the stock... cook until the cauliflower is very tender.
> Pour excess into a cup and save in case you need it later when mixing.
> Using an immersion blender (or reg. blender) mash/puree the cauliflower.
> Mix in the butter, almond meal, cream cheese, and parmesan... adding more parmesan if needed.

Enjoy!

* note: make sure if you use a butter substitute to use one that has non-hydrogenated oils as these are very bad for you according to many sources... When substituting butter I use organic or soy free Earth Balance

Friday, April 13, 2012

photo friday

On our first camping trip together, we fed this family of ducks. This is my favorite shot of the mother. 

Monday, April 2, 2012

berry orange julius

My husband came up with this, it's really good.

Ingredients:
> 3/4 cup milk
> 1/4 cup berry juice or 1/4 cup frozen berries would work too and make it thicker
> 2 - 3 tbsp orange juice concentrate depending on how sweet you want it

Blend  till smooth. Drink. Smile.

Specifically, we used: organic raw cow's milk (from a farm I go to in NY), Northland blueberry, acai, and blackberry juice, and Trader Joe's organic frozen orange juice concentrate.

Friday, March 23, 2012

Photo Fridays


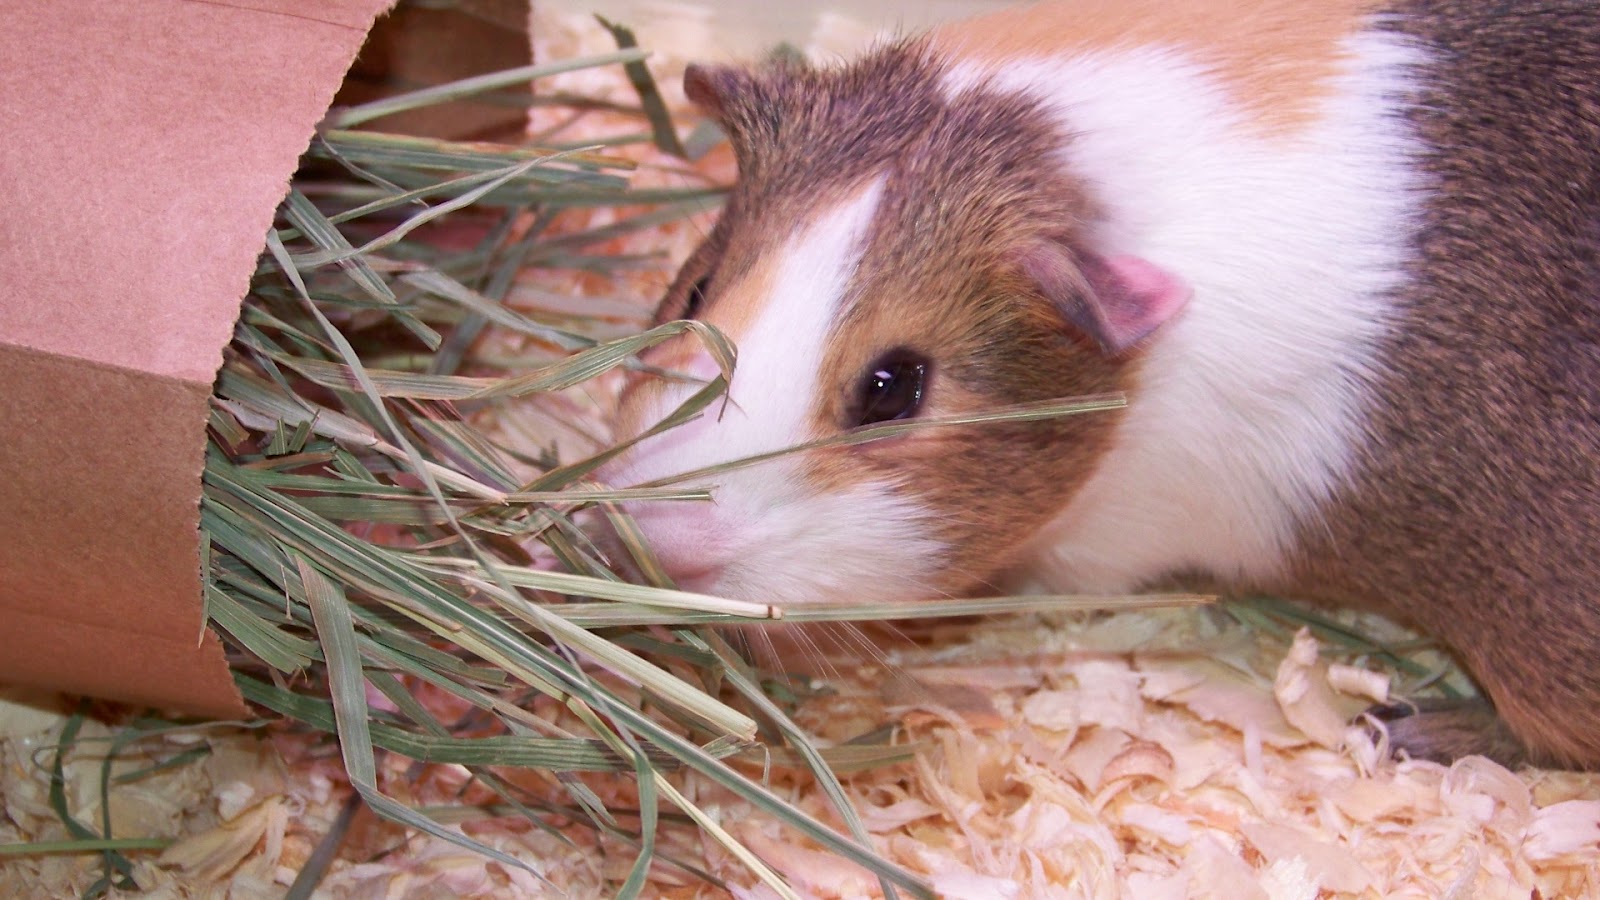
How can she be so cute?! I love how the little things please her most - simply fill a brown paper bag with fresh hay and she's the happiest piggie you'll ever see.

Thursday, March 22, 2012

chocolate chocolate chip brownie cake

... ah, all the above words are delicious and even more delicious slapped together and made to be lower in sugar than most sweets! Don't you agree?!


Ingredients:

1 can garbanzo beans (drained and rinsed)
1/2 oats
1/2 cup honey powder
1/4 sugar
1/2 Tbsp molasses (you could omit this by doing brown sugar instead of regular sugar if you don't have molasses)
3 Tbsp unsweetened applesauce
1 1/2 Tbsp coconut oil (melted.)  (or an oil of your choice)
1 tsp vanilla
1 1/2 tsp baking powder
1/2 tsp sea salt
1/4 cup baking cocoa
1 1/2 tbsp almond meal (or about a small handful of almonds finely ground)
1/2 cup to 3/4 cup of chocolate chips (depends on your sweet tooth)


Directions:

> Pre-heat your oven to 350.
> In a food processor add all the ingredients except the chocolate chips and blend for at least 5 minutes to break up all the beans and oats as fine as possible. (If you're using coconut oil simply measure it into a small glass jar/cup/shot glass (my liquid tsp and tbsp measuring device is a shot glass with the printed measurements on it basically - it works very well for this.) put it in your smallest pot and fill the pot with hot tap water about half way up the shot glass. Then put it over high heat until the coconut oil is almost fully melted. You can remove the shot glass carefully with a pair of tongs.)
> Mix in the chocolate chips by hand.
> Grease a springform cake pan.
> Using a flexible spatula empty the batter into the pan. The spatula will be most helpful in getting (practically) every last bit of the batter out and since it's a thick batter you'll need it.
> Evenly spread the batter into the pan and place in the oven for 35 minutes.
> Remove from oven and let stand for at least 10 minutes before (carefully) removing from the pan.


This cake comes out fudgy and really sweet. It is absolutely at it's best when served warm and accompanied by a glass of milk, in my opinion...
The photos shown are from a bunt insert for my spring form pan but any cake pan should do the trick.
If you're not using a springform pan than make sure to grease the pan thoroughly and simply flip the pan over to allow the cake to fall out - since this cake is fragile.
The directions and time for baking is for a regular 9 - 10 inch spring form pan.
If you wanted it less fudgy you can reduce the applesauce to 2 Tbsp.


Inspiration for this recipe came from this recipe over at Chocolate Covered Katie

Friday, March 16, 2012

artichoke & spinach dip

Ingredients:
- 8 oz cream cheese (softened)
- 9 oz. frozen chopped spinach
- 14 oz can (or 10-12 individual) artichoke hearts  (chopped)
- 1 clove garlic, minced
- 1/2 c grated parmesan
- 1/4 c shredded mozzarella
- 1/4 c provolone (or about 2 slices cubed)
- 2 t crushed red pepper flakes
- pinch of salt and pepper


> Simmer the spinach and chopped artichoke hearts in a 1 c of water over medium heat in a small saucepan. Heat until tender, just about 6-10 minutes. Drain.
> In a large bowl mix all the ingredients in with the still hot spinach and artichoke hearts. Combine well.
> Serve immediately with carrots, crackers, tortilla chips, etc. Or put into small oven-safe dishes to bake at a later time.
> Bake in  (toaster) oven (with a little extra parmesan on top if you'd like) at 375° until it's bubbly and starting to brown on top...


Notes:

- instead of using 1/4 c mozzarella and 1/4 c provolone you can substitute all mozzarella or a mozzarella/Italian cheese blend.
- eyeball the amount of artichoke hearts you use if you're like me and have a large jar of marinated artichoke hearts on hand instead of cans.
- if you're using a microwavable thing of spinach, heat it up per directions and then just saute the artichoke hearts in their own oil (or in a splash of olive oil if they came in water) until tender.  Mix everything together like usual.

Saturday, March 10, 2012

cauliflower pizza crust

So, I started here: http://www.eat-drink-smile.com/2011/04/cauliflower-crust-pizza.html

But although there are many comments on how well it worked we found
some issues we couldn't ignored and I tweaked the recipe.

The ingredients:
1 large head of cauliflower
olive oil
parmesan cheese
mozzarella cheese
oregano
garlic salt
eggs
garlic cloves (optional)


Directions:
> Wash and cut the cauliflower up into small pieces - trying to limit the amount of stalk/stem you use.
> In a food processor just pulse it until it looks grainy but is not at all mushy/pureed. (The slower and  ouch-I-cut-myself way > use a cheese grater to rice the cauliflower.)
> Using a metal strainer with very tiny holes - steam in a large pot for 5 min. with only the tiniest bit of water in the bottom of the pot, just enough to cover the bottom really. (Microwave option: just microwave the bowl of riced cauliflower for 8 min.)
> Press as much water out of the cauliflower as possible after cooking. (I do this by measuring the amount of cauliflower I'll be using (1.5 cups) and scooping it into the middle of two paper towels (layered on top of each other) then gathering the sides up and squeezing.)
> Then mix 1 1/2 cup cauliflower with 1 egg, 1/2 cup parmesan, 1/2 cup mozzarella, 1/2 tsp oregano, 1 clove crushed garlic (optional for those who love garlic), and 1/4 tsp garlic salt until it seems like you could form it into a dough ball basically.
> Lightly oil your pan (make sure to use your thinnest pan). I found a cheap stainless steel pizza pan at my local dollar store and it's perfect for the job.
> Put your ball of 'dough' onto the cookie sheet and press it out gently into a circle shape approximately 11 inches wide. I like to leave the middle at about 1/2 centimeter thickness and the outer crust at a bit over 1/4 inch. Brush with olive oil if you want extra browning on the top...
> Bake on the lowest rack possible in your over for 15 minutes at 475.

> Remove from the oven, turn off the oven. Let it sit for about 5 minutes to firm up... although not necessary if you're really hungry - we found it helped a bit.
> Put your toppings on and place under the broiler (on low) until the cheese is melted and to your liking.
> Take out and let sit for at least 5 minutes, this lets the parmesan do it's magic and results in a sturdier crust.

> EAT!

* 1 large head of cauliflower with yield about 2 to 3 of these crusts...


So that's what we've come up with thus far... I'm looking into what chickpeas might do for the crust, and maybe also fully replacing the mozzarella with just parmesan although I think that'd result in too strong of a flavor honestly... I'm also going to try making a quiche with this recipe... I'll let you know how it turns out eventually.


unbaked crust 
baked crust
finished pizza

last revised:   3-10-12

stuffed mushrooms

My mother-in-law makes these delicious mushrooms stuffed with a sausage mixture, we had them one Christmas and I knew I needed to try my hand at them, and quick - they were SO good. She rattled off the ingredients when I asked for the recipe; she does it by memory and never has measurements. But I forgot what she said by the time I got around to making them. My husband said he'd eat them, but that he disliked how they get so slimy. So I set out to make them non-slimy, and I succeeded. Don't know what I did to be successful in that endeavor, but I'm glad he scarfed them down with a smile.


Ingredients:

> 1 package stuffing mushrooms (washed and patted dry) 14oz.
> 1 package ground pork sausage 16 oz.
> 1 cup of Cabot's Seriously Sharp shredded cheddar cheese
> (optional) 1/8 cup of any other cheese you'd like if you're a cheese lover (american cheese, provolone, parmesan...)
> 1/2 tsp freshly ground pepper
> 1 small onion finely diced
> 2 cloves of garlic finely diced
> 1/4 cup of quick oats (make sure to use the gluten-free variety if you are sensitive to gluten!)
> (optional) 1 tsp - 1 tbsp of crushed red pepper flakes (if you like things with some spice)

Remove the stems from the mushrooms and finely dice them.
Peel and finely dice your garlic and onion.
Cook up the ground sausage, drain and set aside.
In the same pan you just used for the sausage saute the onion, garlic, and mushroom pieces until the onions are translucent.
Mix the sausage back in along with the pepper and quick oats. Cook, stirring often for 2-5 more minutes.
Remove from heat and mix in cheese.
Stuff your mushroom caps and put in the oven at 350 for 15 mins.
Turn off the oven after 15 minutes and let the mushrooms sit for 5.
Take them out and let them sit for another 2-5 minutes to cool.
Serve and enjoy!

You will most likely have left over stuffing mixture... you'll be happy about it though.
It goes great mixed in with some cooked rice and then baked for a bit, or stuffed into peppers. ^__^

Friday, March 9, 2012

easy & fast garlic chicken lunch


Okay, so the ingredients are...
<<< Salmida's state fair lemon garlicious sauce
fresh spinach
boneless, skinless chicken (marinated, grilled, then torn into pieces)
cream
butter
olive oil
italian blend shredded cheese


(onions would be a great addition, sliced very thin and caramelized a bit - but that'd add time to what's meant to be a 5-minute meal! )


> Marinate the chicken over night or for a whole day. Then grill or bake, putting aside the leftover sauce from your night of marination, not what's left in the bottle. Once chicken is done and cooled, using your fingers, break it into bite-size pieces. Put aside.

> Using the leftover sauce from marinating, put it into a small pot and bring to a boil to make sure there are no yucky chicken germs having a party in there... add some cream and some butter... stir and continue to boil for 5 minutes. If it's not thick enough already ( you're going for a gravy type consistency but an easily pourable gravy...) then add 1/2 tsp of starch or arrowroot powder at a time, whisking in until you've reached your desired consistency. Give it one to two minutes each time before adding more...

> Those two items can now be packed for the fridge and saved for quick lunches... but of course you're hungry now so let's get started! We'll pretend it's the next day and you're starting with cold ingredients from your fridge...
------------------------------------------------------ - - -  -  -  -    -    -       -           -

>Take a small handful of chicken pieces and heat up in a small skillet with a bit of olive oil over medium-high heat. (don't stir, we're going for a super simple lunch - one with few dishes to wash afterwards... so we want a clean fork yet.)
> Once chicken is sizzling a bit, add one good heaping forkful of the sauce. Stir.
> Now take 2 to 3 heaping handfuls of (rinse and patted dry) spinach and simply tear in into smaller pieces and toss into the skillet along with the stems. Stir carefully, trying to cover the spinach with the sauce.
> Once spinach is sufficiently wilted remove the pan from the heat, sprinkle with a little italian blend cheese and let cool for 1-2 minutes.

> EAT! Right in the pan - so now you've made yourself a yummy lunch within 5 minutes and you only have two things to clean - a pan, and a fork... ^__^

  Enjoy!    

Wednesday, February 1, 2012

the Bella Paige rattle

This rattle was made for my cousin's little girl Bella Paige. I wrote it down as I went along thus creating the pattern - it's my first pattern so please let me know if you find any faults or have a suggestion on how to make my patterns more appealing or easier to understand. - Thanks!

You will need:
• Your choice of yarns (I used Caron Simply Soft)
• A hook that will give you a tight gauge so no stuffing will show (I used a 6mm/G hook)
• Safety Eyes , buttons, contrasting thread (I used 9mm safety eyes)
• Fiberfill
• Rattle or bells
• Needle to sew parts together

Abbreviations I use:
ch = chain
dec = decrease
inc=increase (2 sc in one sc space)
hdc = half double crochet (UK: half-treble crochet)
sc = single crochet (UK: dc double crochet)
st(s) = stitch(es)
* = repeat directions between * and * as many times as indicated


Head:
Start by making a magic ring, sc 6
Rd. 1: *6 inc* repeat 6 times (12 sts)
Rd. 2: 12 sc
Rd.3: *1 inc, 1 sc* repeat till end of round (18 sts)
Rd. 4: 18 sc
Rd. 5: *2 sc, 1 inc* repeat till end of round (24 sts)
Rd.6: 24 sc
Rd. 7: *1 inc, 3 sc* repeat till end of round (30 sts)
Rd. 8: 30 sc
Rd. 9: *4 sc, 1 inc* repeat till end of round (36 sts)
Rd. 10
& 11: 36 sc , tie off and weave in ends.

Make another magic ring with 6 sc
Rd. 1: 6 inc (12 sts)
Rd. 2: *1 sc, 1 inc* repeat till end of round (18 sts)
Rd. 3: *1 inc, 2 sc* repeat till end of round (24 sts)
Rd. 4: *3 sc, 1 inc* repeat till end of round (30 sts)
Rd. 5: 30 sc
Rd. 6: *1 inc, 4 sc* repeat till end of round (36 sts)
Rd. 7
& 8: 36 sc, tie off and leave a long enough tail for sewing head pieces together.

Ears:
For each ear, start out by making a magic ring with 6 sc.
Rd. 1: 6 inc (12 sts)
Rd. 2 – 4: 12 sc, tie off leaving a tail to sew ear to the head.

Ring:
Rd. 1: ch 12 and join with a sl st.
Rd. 2: 12 sc

Continue working round and round, firmly stuffing as you go until it’s the right length for placing the bear head in between as pictured. How many rounds you’ll end up doing is dependent on the type of yarn and hook you’re using… but I’d say no shorter than about 10 inches long. Tie off, and leave a long tail for sewing.


Putting it all together:

- Sew on a nose and eyes (or use buttons, safety eyes, etc.)
- Then sew the ears on to the last row of either piece of the head, eyeballing where to locate them, weave in ends.
- Now, sew the head pieces together with the remaining tail of yarn from one of the head pieces. Stuff the head firmly as you go. Wrap the rattle in stuffing and put that in before the opening gets too small. Continue sewing together the head and stuffing until you’re done and then weave in the ends of the yarn.
- Taking the tail from the ring and needle, insert the needle into one side of the head and pull it out directly opposite (as best you can) on the other side, go through a sc on the other end of the ring and go back through the head. Do this all the way around the rings, pulling firmly as you go but not too firmly or you’ll squish the bear’s face in too much. Once you’re done attaching the ring, tie off and weave in ends.


2009 Copyright by Christen Laughlin
All rights reserved, not to be reprinted
Patterns are for personal use only, not for commercial or retail purposes

CLICK HERE to get the PDF for the pattern through ravelry!